Are you a huge fan of DIY and upcycling old things? If the answer is yes, then you must already be familiar with looking at a box of old junk in the back of the garage and seeing hundreds of opportunities to create something new with them. In order to recreate this project, you might just find everything you need scattered around in your home. This DIY project by Wire Fence uses an old picture frame, some paint and a couple of tools to create, and it’s beginner-friendly as well!
What you’ll need:
⦁ Chicken Wire
⦁ Frame
⦁ Paint
⦁ Packing Tape
⦁ Staple Gun
⦁ Wire Cutters
⦁ Pliers
⦁ Paint
⦁ Sandpaper
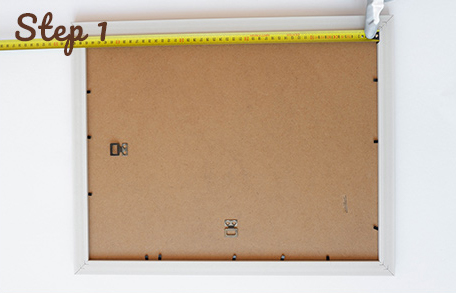
Step 1.
First, you will need to measure your frame. It’s best to do this step at the very beginning when the frame still has its backing inside.

Step 2.
If the frame has a picture or glass in it, take these out, as you will not be needing them. Also, if the frame has a shiny coating, consider sanding it if you want to be able to paint it in the next step.

Step 3.
Paint the frame with the paint of your choice. Feel free to get creative with the patterns and designs! If you would like to achieve a more opaque finish, consider adding a second coat of paint.

Step 4.
If you are going for a rustic, aged look, distress the paint with a fine sandpaper.

Step 5.
Now it’s time to cut the chicken wire to the desired shape. Use the measurements you have taken in the first step, but cut a slightly bigger piece of chicken wire.

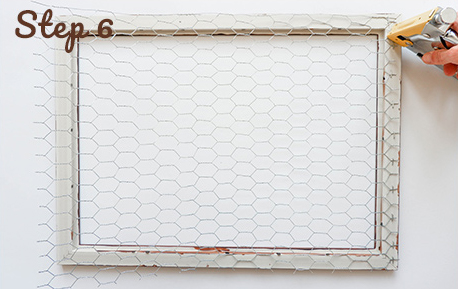
Step 6.
Get a staple gun, and start attaching your wire to the frame. Start at one side and add a staple to every second opening.

Step 7.
Keep stapling along the top side as well.

Step 8.
While stapling the remaining sides, make sure to pull the chicken wire wire slightly to make it more firm and straight.

Step 9.
To prevent accidentally damaging your wall or hurting yourself while handling the frame, consider covering the ends with packing tape.

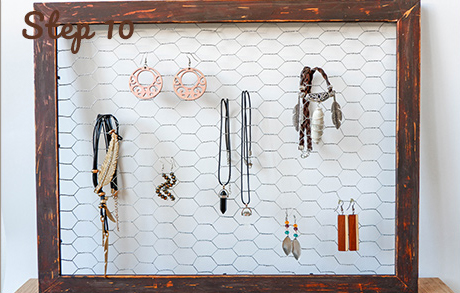
Step 10.
If you have followed the instructions, you should have a finished jewelry holder at your disposal. Congrats!

Gust post created and supplied by
- DIY Chicken Wire Jewelry Holder - June 27, 2022
- Jewelry Designer Manager Alternative - December 8, 2019
- 3 Tips To Immediately Boost Your Sales Today - May 12, 2019
